Quick Setup Guide
This page describes how to get started using Experlogix Smart Flows solutions for Microsoft Dynamics 365 CE users.
Download and Import the Experlogix Smart Flows Solution(s) for Microsoft Dynamics 365 CE
| 1. | Go to the most recent Download Installers page and download the most recent version of Experlogix Smart Flows for Microsoft Dynamics 365 CE Core Managed solution or Workflows Managed solutions if you want to use the Workflows. |
| 2. | To import the solution(s) in the target Microsoft Dynamics 365 CE instance, go to Settings > Advanced Settings. |
| 3. | In the dropdown menu, select Solutions. |
| 4. | Select the Import button. |
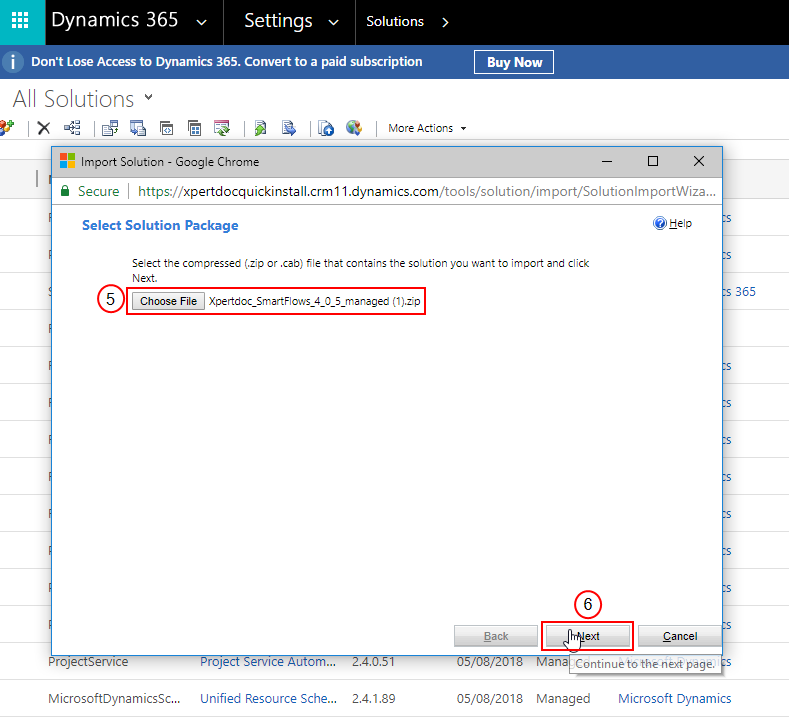
The Select Solution Package window displays.
| 5. | Select the Choose File to select the solution you want to import. |
| 6. | Select the Next button. |
Set Security Roles
| 1. | In Microsoft Dynamics 365 CE, go to Settings > Advanced Settings. |
| 2. | In the dropdown menu, select Security. |
| 3. | Select the Users button. |
The User list displays.
| 4. | Select the Manage Roles tab. |
| 5. | Select the checkboxes to assign the Experlogix Smart Flows security roles to the relevant users. For more details, refer to section Smart Flows Security Roles. |

Configure the Smart Flows Project Console
| 1. | On your Experlogix Smart Flows Purchase or Trial, you should have received an e-mail with first-time log-in information for your Experlogix Smart Flows project. |
| 2. | Open the project URL and use the credentials provided in the e-mail to log in. |
| 3. | Follow the steps in Initialization Wizard to set up a Microsoft Dynamics 365 CE connector for your project: |
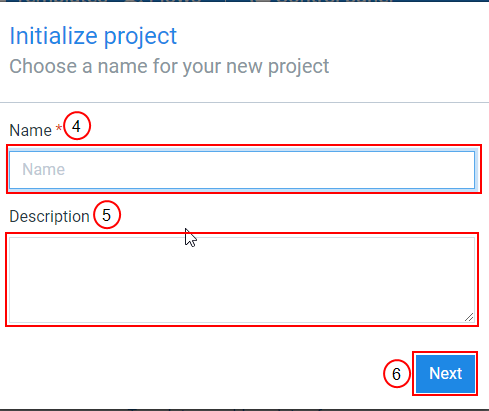
| 4. | In the Name field, input the name of the project. |
| 5. | (Optional) In the Description field, input a description of your project. |
| 6. | Select the Next button. |
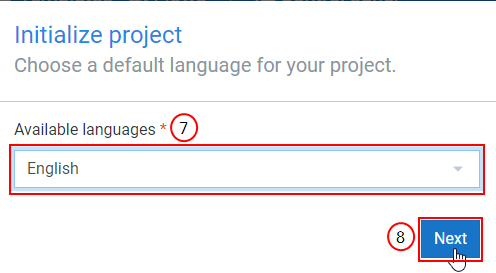
| 7. | In the Available languages field, choose a default language from the dropdown menu. |
| 8. | Select the Next button. |
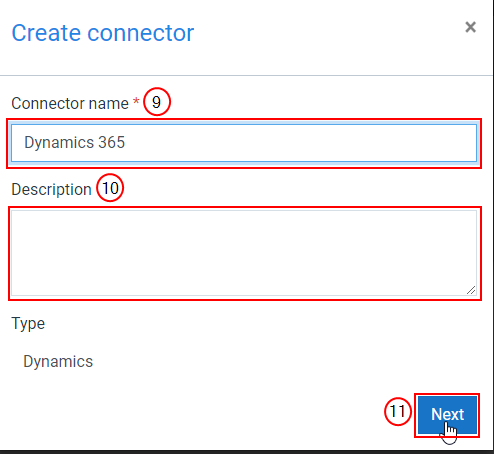
| 9. | To configure a connector for the target Microsoft Dynamics 365 CE instance, in the Connector name field, input the connector name. |
| 10. | (Optional) in the Description field, input a description for the Connector. |
| 11. | Select the Next button. |
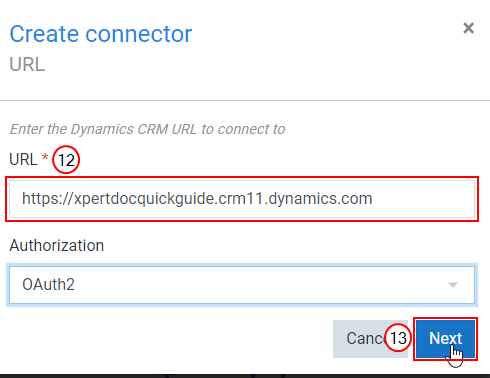
| 12. | Enter the URL for the Dynamics instance you wish to connect. |
| 13. | Select the Next button. |
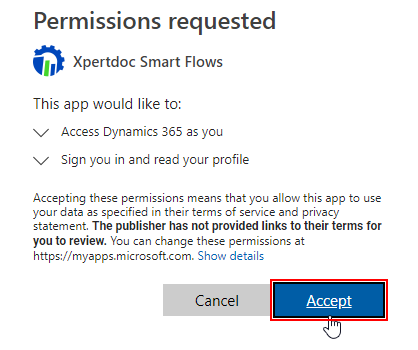
A Permissions Requested page displays.
| 14. | Select the Accept button. . |
| 15. | Select the checkbox to Add Smart Flows Configuration. |
| 16. | Select the Next button. |

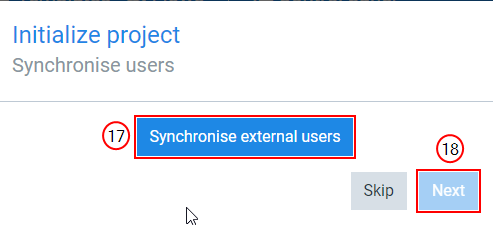
| 17. | Select the Synchronise External User button to sync the users that have the Experlogix Smart Flows security role in Microsoft Dynamics 365 CE. |
| 18. | Select the Next button. |
The Welcome page displays.
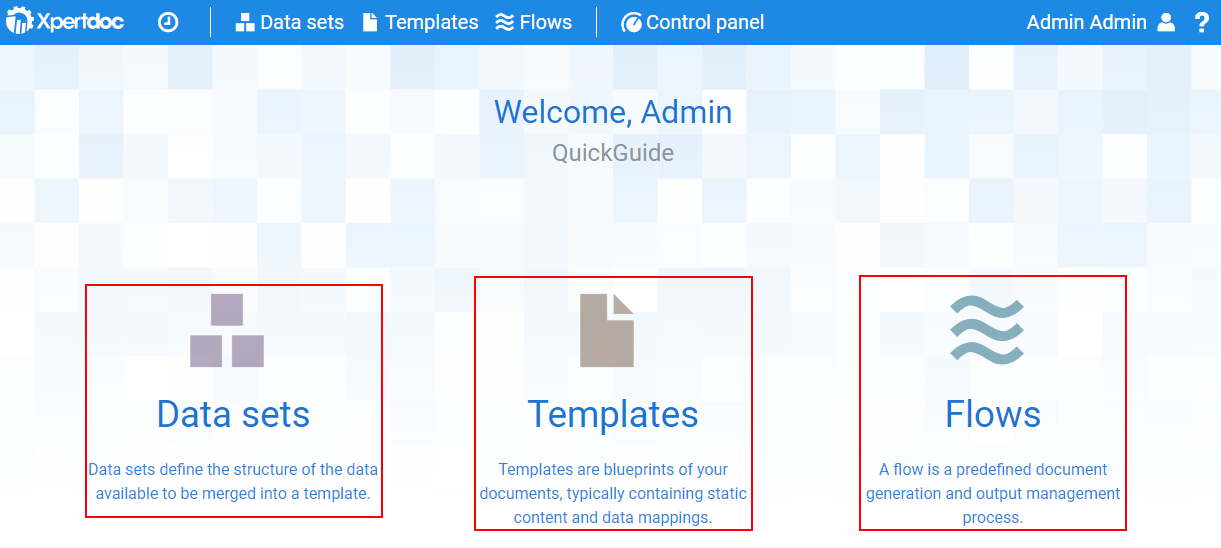
You are now ready to create your first Data sets, Templates, and Flows.
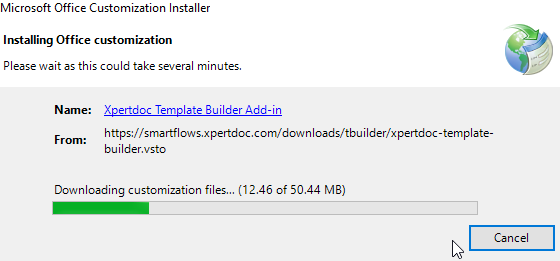
Download and Install the Experlogix Template Builder Add-in for Microsoft Word
| 1. | Select on the Download Installers link to download the Experlogix Template Builder for Microsoft Word and install the add-in. |
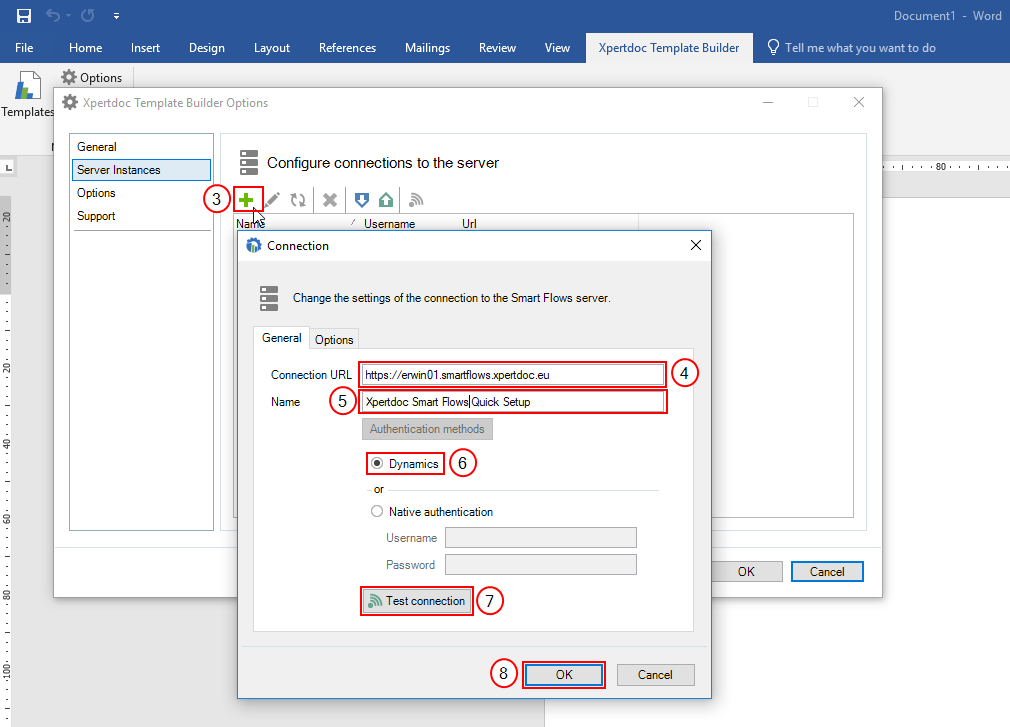
Configure the Template Builder
| 1. | Open Microsoft Word. |
| 2. | On the ribbon, go to ExperlogixTemplate Builder > Options > Server Instances. |
| 3. | Select the + button. |
The page refreshes with the Server Instances options.
| 4. | In the Connection URL field, input the URL. |
| 5. | In the Name field, input the name of your project. |
| 6. | Set the Authentication method toDynamics. |
| 7. | Select the Test connection button to test your connection. |
| 8. | Select the Ok button. |
The connection window no longer displays.
Template Builder is now connected to your project.